How to Recover a RAID Array and Copy Its Data?
Is your RAID array no longer accessible? Has the network drive stopped working? Did you lose all data while rebuilding a disk array? Would you like to recover your files but you don’t know how? Download and install this program!
Connecting the disks of the array to a computer
For starters, connect the hard disks to a computer where you have installed Hetman RAID Recovery.

Check this one out to see how to connect hard disks to a PC, and what to do if you lack disk ports, or there is no Windows PC at hand:

For RAID Controllers
Disconnect from the RAID controller the hard disks that used to make up the array, and connect them to the corresponding ports on your Windows PC motherboard (SATA/SAS/SCSI/M2/PCI/Fibre Channel etc.).
Watch this video to find out how to recover data after a controller failure:
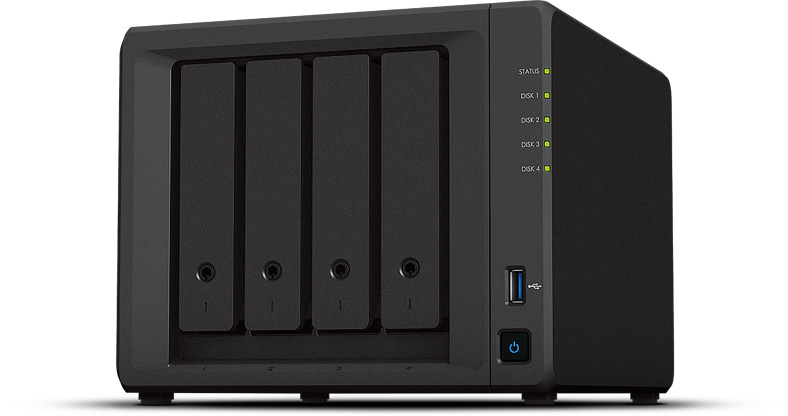
For network drives
If the array was built on a network drive, take the hard disks out of the storage device and connect them to a computer.
Watch this video about recovering data from a RAID array on a network drive:
For motherboards
If the hard disks are combined into a RAID with the help of the motherboard, there is no need to reconnect them. In this case, however, they will become inaccessible for the operating system as long as they are a part of this RAID. You need to open the RAID management utility and dismantle the array.
Arrays built with the help of the motherboard are often managed via BIOS. In this case, you should dismantle the array in the corresponding BIOS tab. After that, you should switch hard disk mode from RAID to SATA or AHCI.
If the motherboard is “dead” and your PC doesn’t work, you will have to connect the hard disks to another computer.
Watch this video about recovering data from an array built on the motherboard:
Automatic detection of RAID settings based on service information found on the hard disks
The hard disks within the RAID contain the following information:
- Number and order of disks;
- RAID level, block order and size;
- Offset and parity delay, etc
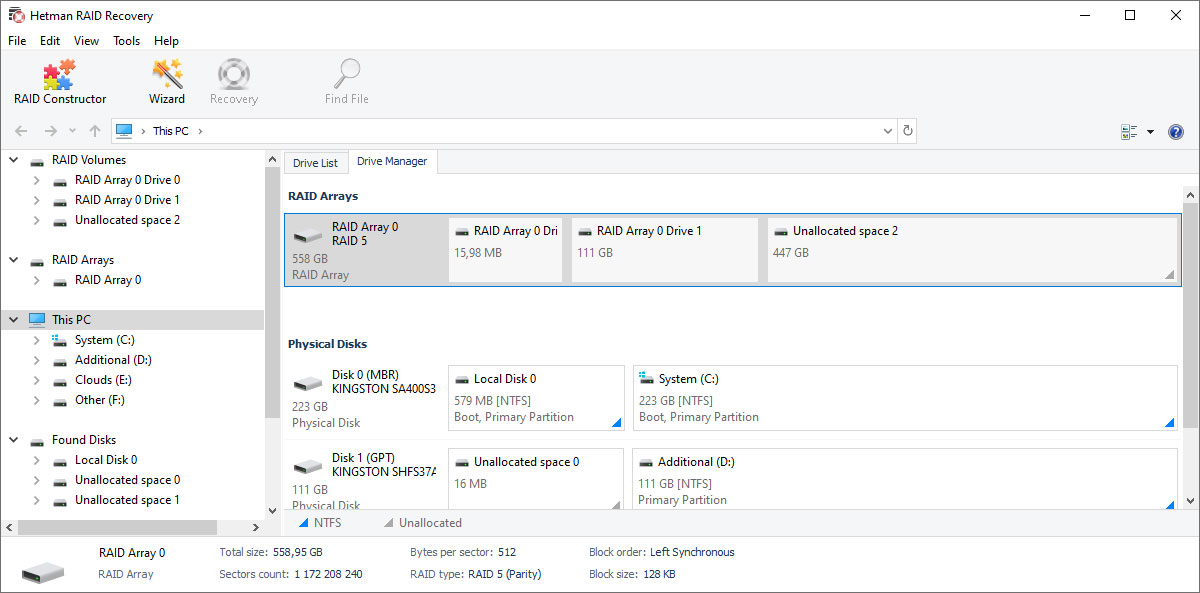
At startup, Hetman RAID Recovery reads the service information from all hard disks connected to the computer, and then displays the array it has built as one drive. Then you can open this drive to view and save the files.

Any identified arrays are displayed in the main window, in the Drive Manager tab.
The following array types are recognized automatically:
- RAID 0 (Striping);
- RAID 1 (Mirroring);
- RAID 1Е (Enhanced Mirroring);
- RAID 5 (Parity);
- RAID 6 (Double Parity);
- RAID 10 (RAID 1+0);
- RAID 01 (RAID 0+1);
- RAID 50 (RAID 5+0);
- RAID 60 (RAID 6+0);
- X-RAID (Netgear);
- SHR, SHR2 (Synology Hybrid RAID);
- RAID-z1, RAID-z2, RAID-z3 (ZFS file system).
The utility will read the settings from the hard disks of the non-operable array which is created with:
- RAID controllers: HP (Hewlett-Packard), IBM, Intel, LSI, Adaptec, Supermicro, Areca and others;
- Network storage devices: ZyXEL, D-link, Netgear, Seagate, Western Digital, Synology, Qnap, Cisco, Linksys, Acer, Iomega, Promise, Thecus etc;
- Motherboards: ASRock, Acer, Asus, Gigabyte, HP, Intel, MSI etc;
- Operating systems: Windows (Storage Space, dynamic disks), Linux (LVM, MDADM), MacOS, FreeBSD (GEOM), TrueNAS, Xpenology, OpenMediaValut, Intel Rapid Storage Technology etc;
- File systems: BTRFS, ZFS, XFS and others.
Building an array in the manual mode with automatic selectin of settings
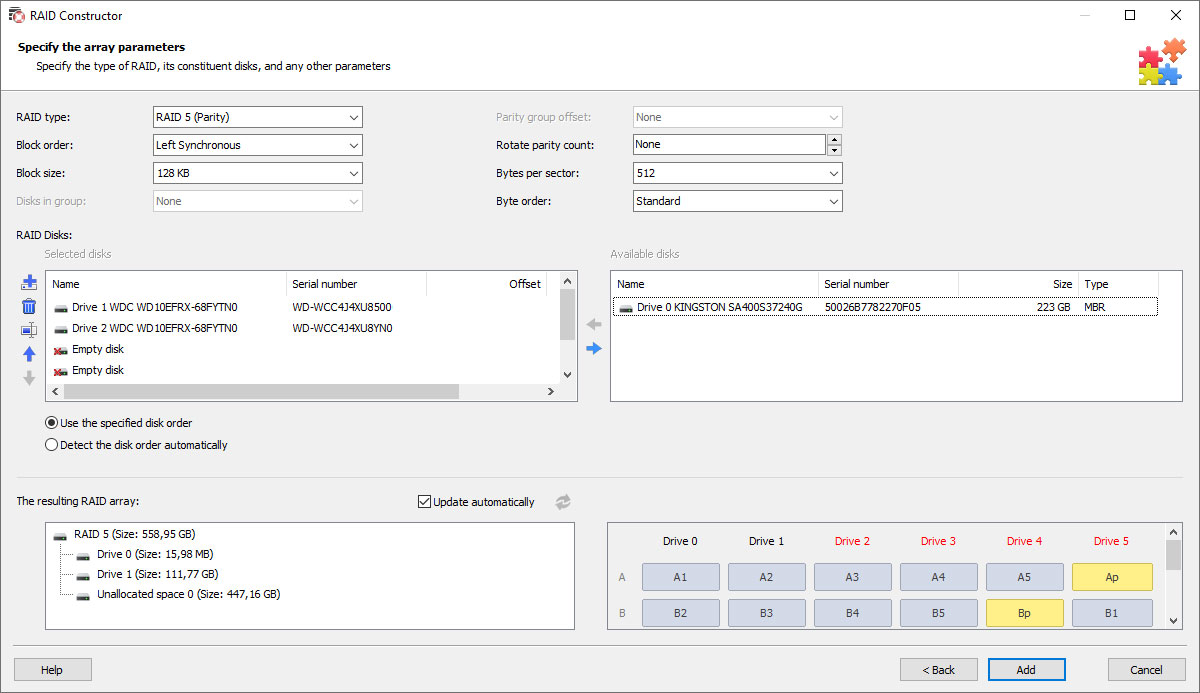
Using the RAID rebuild wizard, you can recreate the array on your own, if it doesn’t get built automatically in the program. To do it, you need to specify:
- RAID type;
- Block order and size;
- Disks and their number in a group;
- The offset of the array beginning in regard to the disk beginning;
- Offset and parity delay;
- Number of bytes in a sector;
- Byte order;
- Disks within the array.
The wizard lets you see the entire tree of directories and files in the built array.

Copying files from the recovered disk array
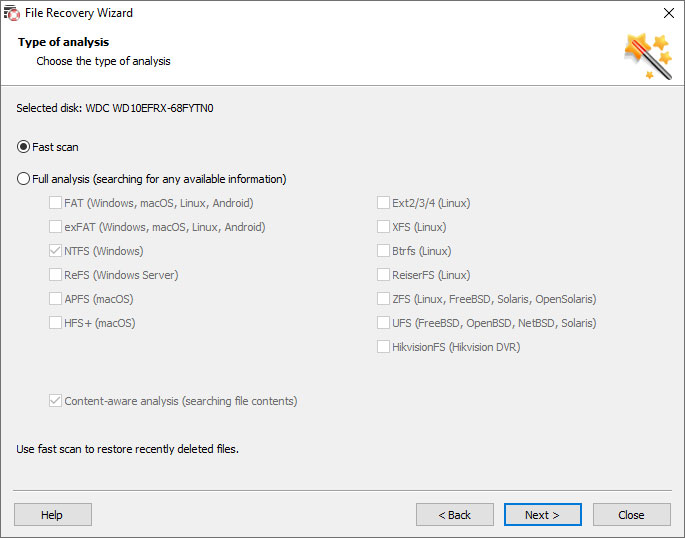
When the wizard has completed its work, you can open the RAID disk in the program and save the files you need. Do it by double-clicking on the disk to start the scan.
You can read more about types of scan and working with virtual disks in this tutorial.

Quick Start
Watch this video to find out how to recover data from a RAID array with the help of Hetman RAID Recovery.
-
What should I do if my motherboard doesn’t have enough ports to connect all hard disks?
If your motherboard doesn’t have enough ports to connect all hard disks, you may consider the following options:
- Using SATA splitters: These are devices that allow to connect several SATA items to a single SATA motherboard port.
- Using PCI Express SATA controllers: Install additional SATA controllers into the PCI Express slot on the motherboard.
- Using external cases for hard disks: Put hard disks into external cases which are connected to a computer via USB, eSATA or another interface.
-
How can I see the RAID array condition?
This is how you can monitor your RAID condition:
- Use a RAID management utility: Most RAID controllers are provided with specialized utilities or software to monitor and manage the RAID system. You can install such utility on your server or PC and check on your RAID from time to time.
- RAID controller web interface: Some RAID controllers provide access to management options via a web interface. You can go to your RAID controller’s webpage using the IP address or DNS data and check on the array status as well as other information.
- Use status indicators on the RAID system case: Many server cases and external RAID cases have LED status indicators to show you the current condition of your array (for example, OK / Fault / Rebuilding etc). Check these indicators on your RAID device.
- Use specialized monitoring tools: There are applications designed specifically to monitor and manage RAID systems. They can provide detailed information on the condition of every disk, the condition of the entire array, event logs etc.
- Check event logs: Check event logs in your operating system or in your RAID controller to detect any errors or abnormal events that may indicate problems with the RAID array.
-
Which software should I use to monitor and manage a RAID system?
Here are some tools to monitor and manage a RAID system:
- RAIDar - RAID monitoring and management software used in NETGEAR data storage solutions.
- MegaRAID Storage Manager - LSI-developed software for MegaRAID controllers.
- Adaptec Storage Manager - a RAID management utility for Adaptec controllers.
- OpenManage Server Administrator - a utility to monitor and manage Dell servers, including RAID systems.
- WebBIOS Configuration Utility - a web interface to configure RAID controllers by Broadcom (previously Avago, LSI).
- Intel Rapid Storage Technology - RAID management software designed for Intel motherboards.
- FreeNAS - an open-source data storage platform with integrated support for RAID array management.
- OpenMediaVault - another open-source data storage platform providing RAID array management options.
- mdadm - a command prompt utility designed to manage software RAID in Linux-based environments.
- Synology DiskStation Manager (DSM) - an operating system for Synology network-attached storage solutions that includes a RAID management interface.
-
Can I use disks from different manufacturers within one RAID system?
Yes, it is possible to use disks from different manufacturers in one RAID setup. However, the following aspects should be considered:
- Data transfer rate: The slowest disk determines how fast the overall array operates.
- Disk size: The smallest disk determines the overall array size.
- Reliability: Using disks from different manufacturers may reduce the risk of simultaneous disk failure related to manufacturing defects.
- Firmware: Differences in firmware may affect performance or (which is worse) cause disks to fail sooner than later.
Generally speaking, it is recommended to use disks of equal size and data transfer rate for RAID setups, but this is not a strict requirement. It is important to remember that your choice to use disks which differ by their specifications may affect performance and reliability of the whole RAID system.
-
How can I identify an interface for connecting hard disks?
The interface to connect a hard disk can be one of the following:
- SATA (Serial ATA) - the most popular interface to connect hard disks in modern computers and servers.
- SAS (Serial Attached SCSI) - the interface typically used in servers and professional setups for high-performance tasks.
- IDE (Integrated Drive Electronics) or PATA (Parallel ATA) - an older standard interface for connecting hard disks which is still used in some older systems.
- SCSI (Small Computer System Interface) - the interface used for a long time to connect hard disks in high-performance servers and workstations.
- NVMe (Non-Volatile Memory Express) - the new protocol for SSD that provides considerably higher data transfer rates via PCIe bus, which makes it a perfect choice for high-speed RAID setups.
Post a testimonial
Read user reviews of Hetman Software programs or share your experiences. Your review will be published after being moderated. We value your opinion! Total reviews: 39. Average ratings: 5.


Recommended tools
We recommend that you familiarize yourselves with the opportunities offered in other Hetman Software utilities. You can significantly save on the purchase or buy a program with the features that best suit your needs.